
Animated Banner Block
Introduction:
In today's digital world, attention-grabbing visual elements are crucial for captivating your audience. Animated banner blocks are an excellent way to enhance the visual appeal of your website and engage your visitors. In this blog post, we'll explore how to create animated banner blocks using the K2 Blocks plugin, allowing you to customize their size, font styles, and add captivating overlays.
Understanding Animated Banner Blocks in K2 Blocks:
Before diving into the customization details, let's briefly discuss what animated banner blocks are and why they are beneficial for your website.
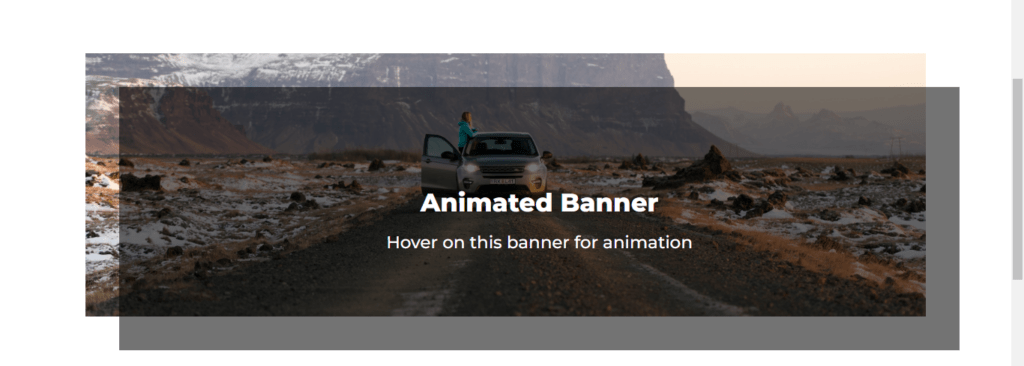
Animated banner blocks are visually appealing elements that become interactive when hovered over. These blocks consist of a banner area with an overlay containing a heading and a paragraph. They allow you to display important messages, showcase products, or highlight specific content in an eye-catching manner.
Getting Started with K2 Blocks:
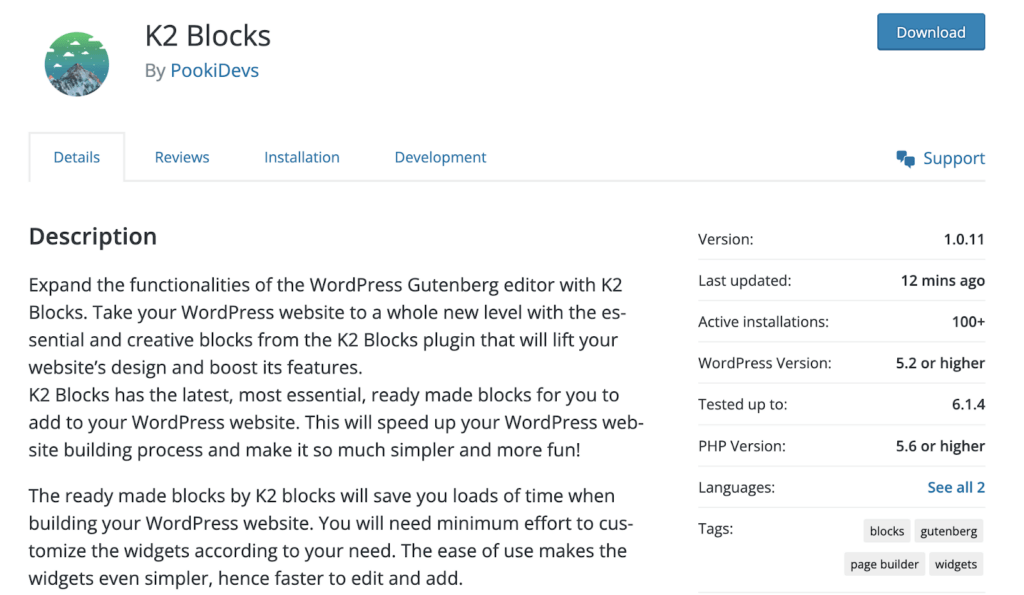
To create animated banner blocks, you'll need to have the K2 Blocks plugin installed on your WordPress website. If you haven't installed it yet, head over to the WordPress backend, navigate to the 'Plugins' section, and search for 'K2 Blocks.' Install and activate the plugin to begin.
Creating Animated Banner Blocks:
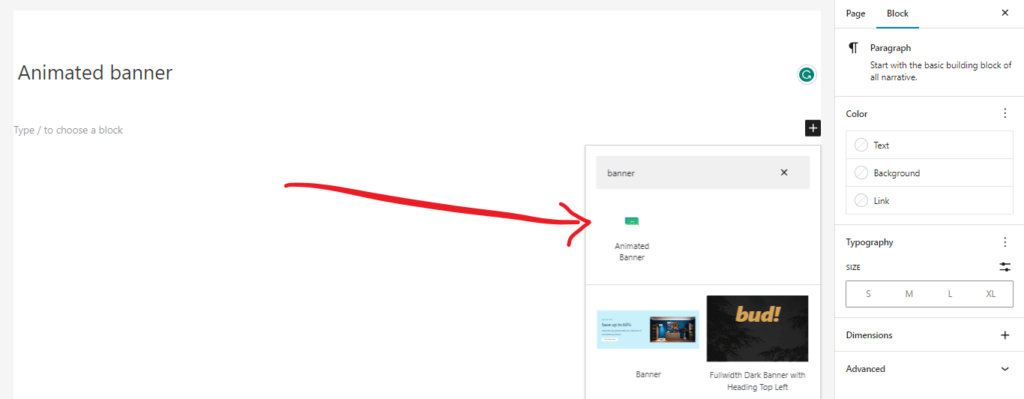
- Open the page or post where you want to add the animated banner block using the K2 Blocks editor.
- Look for the K2 Blocks section in the editor's block list. Add a new block by selecting 'Add Block' and search for 'Animated Banner.'
- Customizing Your Animated Banner Block:
Now comes the exciting part – customizing the animated banner block to match your website's aesthetics and branding. Here's what you can tweak:
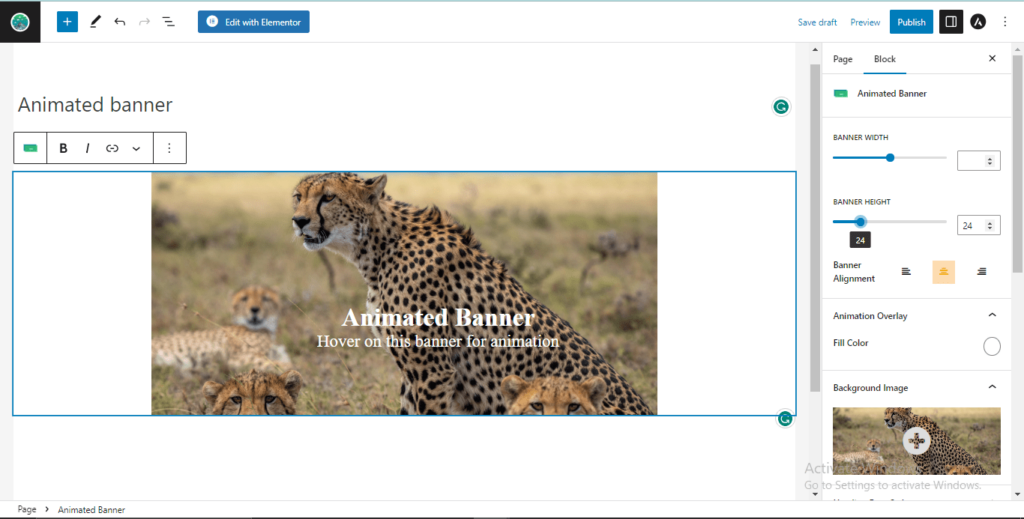
- Adjusting the Size:
Using the K2 Blocks editor, you can easily modify the height and width of the animated banner block. Simply click on the block and look for the sizing options. Experiment with different sizes until you find the perfect fit for your website layout.
- Changing Font Styles:
To make your animated banner block visually appealing, it's crucial to select the right font styles for the heading and paragraph. Within the K2 Blocks editor, you'll find options to change the font type, size, color, and other text properties. Explore these options to find the ideal combination that reflects your brand's personality.
- Adding Overlay:
The overlay is an essential element that appears when hovering over the animated banner block. It provides an opportunity to add more information, such as a catchy heading or a brief description. Within the K2 Blocks editor, locate the overlay options, and customize its appearance according to your preferences.
- Adding Content and Enhancements:
Now that you have set up the animated banner block, it's time to add the actual content that you want to showcase. Add compelling headings and engaging paragraphs that will captivate your visitors. You can also enhance the block further by integrating captivating animations and effects, supported by the K2 Blocks plugin.
Getting started with Animated banner block:
Step-1: Install the k2-blocks plugins on your website from wordpress repository or download it from the website
Step-2: Open your website gutenberg editor of the page and search for “Banner” and insert call to action block into the page.
Step-3: Insert the block on the page and start customizing it according to your needs.
Step-4: Change text, change width and height of progress block and other color settings..
Step-5: Publish the page and preview it using the link.
Conclusion:
Animated banner blocks offer an excellent way to present your content in a visually appealing and interactive manner. Thanks to the K2 Blocks plugin, creating these blocks is a breeze, allowing you to customize their size, font styles, and overlay appearance. By incorporating animated banner blocks into your website, you can captivate your audience and deliver your message more effectively.